Monday, November 28, 2011


Scroll down for giveaway details!

Good morning everyone! It's time for another of KinderStampO's Color it Monday. Here is a picture of the inspiration and my project. I used the Imagine to color and cut the different pieces. The hot chocolate cut is from the Yummy cartridge. The sentiment says "Everything's better with hot chocolate" and is from KinderStampO's Vintage and Traditional Holiday stamp set. You can check it out here.

*************************************************

Hello everyone! To celebrate the holidays I will be doing a giveaway! Everyone who is a follower and leaves a comment on my blog between November 22 and December 18 will be entered to win the Gingerbread Cricut cartridge, Inkadinkado Christmas stamps, and Stickles bundle! The winning comment will be posted on December 19!
***************************************************

Thanks for stopping by!

Wednesday, November 23, 2011

KinderStampO's Sketchy Wednesday

Scroll down for giveaway information!


Hello everyone! It's time for another of KinderStampO's Sketchy Wednesdays. Here is a picture of the sketch and my project. I used the Santa's Village Imagine cartridge again for this project. It came together very quickly and was super simple! I cut this out using Cricut Craftroom. I used a basic square shape and filled it in with one of the patterns on Santa's Village and then cut Mrs. Clause with layers so I could pop up her face and arms. The sentiment is from KinderStampO's "Vintage and Traditional Holiday" stamp set that you can check out here.

*************************************************

Hello everyone! To celebrate the holidays I will be doing a giveaway! Everyone who is a follower and leaves a comment on my blog between November 22 and December 18 will be entered to win the Gingerbread Cricut cartridge, Inkadinkado Christmas stamps, and Stickles bundle! The winning comment will be posted on December 19!
***************************************************

Thanks for stopping by!

Wednesday, November 16, 2011

KinderStampO's Sketchy Wednesday


Good morning everyone! It's time for KinderStampO's sketchy Wednesday. I have included a picture of the sketch and my card. This is my first project with the new Santa's Village Imagine cartridge. I LOVE this cartridge! Santa is three layers tall with his torso popped up and his arm popped up on top of that. I love the dimension that this creates but it doesn't translate well in this picture. His boots are also popped up. This cartridge really allows you to do a lot of layering if that's the look you desire. The present is on top of a handmade rosette and I added some Glossy Accents to the bow top. The sentiment is from KinderStampo's "Greetings From Home" stamp set. I'm really happy with how this turned out and it was so super simple to put together thanks to the Imagine. Thanks for stopping by! Have a fantastic day.

Monday, November 14, 2011

KinderStampO's Color it Monday


Hello everyone! I just got back from the local Scrapbooking Expo and I was so excited to use my new toys from the show! For this card I used a stamp and die set from Heartfelt Creations to make the flowers. The stamps and the dies coordinate perfectly together. I stamped the flowers with black ink and then cut them with the matching dies. After that I colored them in with Copic markers and added Coral Reef and Vanilla Breeze Glimmer Mist sprays to them as well. I darkened the edges with Distress ink and glued a little Martha Stewart glitter to the inside of the flowers. The stamp set I used for the sentiment is from KinderStampO's "Greetings From Home" stamp set. I hope you enjoy!

Monday, November 7, 2011

KinderStampO's Color it Monday


Hello everyone! Here is another submission for KinderStampO's color it Monday. I love how the colors work together in this card. It's very bright and fun. I used KinderStampO's "Greetings From Home" stamp set for the sentiment. I used an Anya stamp from The Greeting Farm and Copic markers to color the stamp in. The flowers are Prima and their brad centers are from Close to My Heart. The orange cardstock is cut with a Martha Stewart border punch and I topped it all off with a ribbon from my stash. Thanks so much for stopping by!

Monday, October 24, 2011

KinderStampO's Color it Monday


Hello everyone! It's time again for another KinderStampO Color it Monday. On this card I used Grungepaper covered in silver paint dauber and crackle paint. After I let that dry I cut out the cage using the Tim Holtz Sizzix Caged Bird die. I then cut the bird section of the die also from Grungepaper, inked it up, and then covered it in Glossy Accents. I took one of KinderStampO's Vintage Letter charms and covered it with a silver paint dauber and stamped my sentiment inside of it. I used the KinderStampO "Greetings From Home" stamp set. Once the sentiment was dry I also covered that with Glossy Accents. For the pink and silver background paper I used a white sheet of cardstock and stamped it with a background stamp that was inked up with silver paint dauber. I then brushed on pink die ink. I hope you enjoy! Thanks for stopping by :)

Tuesday, October 18, 2011

Luau Layout


I got to do some scrapbooking supply shopping today and I found some really great tiki paper! I had the perfect pictures of a luau that have been just sitting here waiting for me to get started on a layout for them and when I found this paper today I was completely inspired. I used the Mahalo and Mahalo Nui Loa svg sets from Lettering Delights for the cuts. I also inked up the edges a bit and threw in a few Jolee's stickers to finish it off. I'm really pleased how this came out. Then again I'm pleased just to be knocking out a layout since I have been getting behind on them lately lol. Thanks for stopping by!

Monday, October 17, 2011

KinderStampO's Color it Monday


Opps I got so totally consumed by work this weekend I totally forgot to post my project! It's nice to finally be home and looking forward to a couple days off.

For this project I decided to try something new. I didn't have the right shades of paper for this particular Color It Monday project so I opened up the Color It Monday inspiration picture in a photo editing software and used the eyedropper tool to find out what each RGB code was for the inspiration colors. I then entered those RGB codes into my Imagine to get a print and cut image with the right shade of cardstock! I love my Imagine! It's so versatile and easy to use, not to mention I only had to use white cardstock to complete this project! I used the Greetings From Home stamp set. Check it out at the KinderStampO online store here http://www.kinderstampo.com/p/online-store.html. I also used the Florals Embellished Cricut cartridge for the cuts. I hope you enjoy! Thanks for stopping by.

Thursday, October 13, 2011

Cricut Blogiversary Challenge Entries


I have a bunch of cards to share with you today! The first card is an entry in to the monochromatic challenge on the Cricut Circle blog. I made the card with Love you a Latte and Art Philosophy. The coffee is made from four layers and it's one of the cuts on Love You a Latte. The background is made of three layered cuts from Art Philosophy. The card layer comes first, then the brown background, and then the white border. The tag is also cut from Art Philosophy. The sentiment is from Pink By Design's "Perk Up" set. I really love how this card turned out!


The second card is made with my Imagine and is an entry in the Imagine card challenge on the Circle blog. All of the images and background paper is from Kate's Kitchen. I printed a full sheet of the cherry paper and trimmed it to fit my card. The t0aster image is cut using the layers feature and I added Glossy Accents to the toaster eyes and to the pat of butter to add a cute detail. The background tag is one of the basic images that comes pre-loaded on the Imagine. It is cut in two layers, the larger one being with a background paper also from Kate's Kitchen. The sentiment is from Scrappy Mom's stamps "A Pinch and a Dash" set. This card was super easy and still came out super cute!


This card is made for the Circle cartridge challenge. I used French Manor (Circle cartridge) for the background card. I also used Sophie (Circle cartridge) for the flower. I can't remember which cartridge I used for the tag. I think it was probably Gypsy Wanderings since that's ususally where I get my tags from. The small flowers are Punch Bunch paper punches that I added black rhinestones to.


The last card I have to share with you today is made from Sophisticated. It's an entry to the Circle blog sketch challenge. I got a little crazy on this card because I cut out the key, keyhole, and sentiment from Sophisticated and I didn't like the way it looked against my background paper so I attatched the keyhole and key to white paper and trimmed around it. I then cut up the sentiment so that I could arrange the words to fit in the lower right hand corner. The white strip is punched on both sides with a Martha Stewart border punch and then I added a ribbon the the center. the tiny hearts in the upper left hand corner were the left overs from the border punch.

I hope you enjoyed my posting spree today! Thanks for stopping by.

Wednesday, October 12, 2011

Art Philosophy Fall Card


Hi guys! I've been getting all of my Cricut Circle Blogivesary Challenge entries ready to post. This is an entry for the Cuttlebug challenge on October 5th. The requirements of the challenge were to create a project with the Cuttlebug as the focus with at least two Cricut cuts. I broke out the Art Philosophy cartridge again for this card. It was quick and easy and I still think it came out nice. I cut out the diamond shaped card as the background. I cut the individual diamond shape at two varying sizes and used Cuttlebug folders to emboss each one. I then cut the tag and leaf at their corresponding sizes that matched the stamp set. I added a little inking, some stamping, and a few rhinestones and twine and viola! Easy peasy. I hope you enjoy. Thanks for stopping by!

Tuesday, October 11, 2011

Cricut Circle Challenge entry


Last week was the Cricut Circle's blogiversary so to celebrate they are having a whole weeks worth of challenges with some really awesome prizes. I've been busy crafting away to come up with some entries and it's given me a chance to use some of my new carts so I had a ton of fun. My first entry is for the oct 7th challenge. The requirements were:

Your project can be any type, as long as you incorporate these three things.

1) A title

2) At least 2 Cricut Cuts.

3. At least 3 buttons.

Here is what I came up with. I used my new cartridge Girl's Makeup Party cartridge (which I bought specifically for this fantastic title cut). The pink and white layers of the title are cut at 3 inches. I used the same cut twice but for the white background I used my Gypsy to hide all the inner cuts. I then took that same hidden inner cut image and sized it to 3.2 inches and cut it out of black as well for the final layer. The nail polish bottle is cut in the same manor. The picture mats are cut from Art Philosophy. The paper is Teresa Collins Posh collection and the girl heads I cut out by hand from one of the pieces of cardstock in the collection. I then added small button brads to the corners of the photo mats. I'm really excited with this one because it's been so long since I have made a layout. Now all I have to do is add in my photos. I hope you enjoy! Thanks for stopping by.

Monday, October 10, 2011

KinderStampO's Color it Monday


Hello everyone! It's time for another KinderStampO Color it Monday design team submission. I used the "Greetings From Home" KinderStampO stamp set. Check it out at Jess's store http://www.kinderstampo.com/p/online-store.html.
I'm excited about this card because I got to use my new Art Philosophy Cricut cartridge for the first time. I really love that cartridge! It's really versatile and I really like the fact that it comes with stamp sets that coordinate with the cuts. It's pretty pricey so I'm sure I'll be using it as much as I can to offset the price of the most expensive cartridge I have ever bought lol. I hope you enjoy. Thanks for stopping by!

I have entered this into Exploring Cricut's first challenge! Check it out here.

Wednesday, October 5, 2011

KinderStampO's Sketchy Wednesday


Hi everyone! I'm back with another design team submission for KinderStampO's sketchy Wednesday. I searched my stash for this project and was able to use different odds and ends that I felt went with the theme of the card. I also used the KinderStampO "Greetings from Home" stamp set. Check out the stamp set and all of Jess's other fabulous sets at the KinderStampO store. The image is from The Greeting Farm and I colored it in with my copic markers. I ususally do bold bright coloring but this time I did pale colors with little shading to give it more of a washed effect. I hope you enjoy. Thanks for stopping by!

Wednesday, September 28, 2011

KinderstampO's Sketchy Wednesday


Hello everyone! I'm back with my design team submission for KinderStampO's Sketchy Wednesday! I used the KinderStampO "Greetings from Home" stamp set. You can take a look at it here at the KinderstampO Shop. I also used the greeting farm stamp called Soldier Ian and colored it with my Copic markers. Here is the sketch and what I came up with. I hope you enjoy! Thanks for stopping by.

Monday, September 26, 2011

KinderStampO's Color it Mondays


Hi everyone! It's time for another of my design team submissions for KinderStampO's Color it Mondays. I used the "Greetings From Home " stamp set that you can check out here. I also used my brand new Sophie cartridge that I just love! Here is a picture of the inspiration and what I came up with. Thanks for looking! Have a fantastic day.

Monday, September 19, 2011

KinderStampO's Color It Monday


Hi guys! I'm back this week with another color it Monday design team submission for KinderStampO. The first picture is the color inspiration. I used the KinderStampO "Grettings from Home" stamp set. You can check it out at Jess's store here. I also used a digi stamp from Hope Jacare Doodles. Check her blog out here. Want to see the rest of the fabulous design team projects? Just go on over to the KinderStampO blog and take a look! www.KinderStampO.com

Thanks for stopping by!

Wednesday, September 14, 2011

Glitter Anya Experiment


I wanted to make a Christmas card with a Greeting Farm stamp. The only problem was that I didn't own any Greeting Farm Christmas stamps lol (although I have some coming in the mail, yay!). I decided to experiment a little with my Fleur Anya stamp to see what I could come up with. I I coated a piece of white cardstock with white glitter and then I used VersaMark to stamp Anya on to the glitter. I then coated the stamped image with glitter embossing powder and heat set the powder. I colored in Anya with my Copic markers on top of the white glitter. To me Christmas means red and sparkly so this is what I came up with. I also used the Cricut Winter Lace cartridge to cut the snowflakes. I love my Cricut! I can't seem to do any project without using it. The sentiment is a K and Company sticker. So what do you think? I'd love it if you told me some of your thoughts. Thanks for looking!

I've entered this card in The greeting farm's Farm Fresh Friday challenge and Cricut Circle's weekly blog challenge.

P.S. Thanks so much to The Greeting Farm design team member Emily Martina! I won her Greeting Farm gift card giveaway. She's extremely talented and I love seeing what she comes up with for all the Greeting Farm challenges. Visit her fabulous blog Beans Scraps & Sheep.

Monday, September 12, 2011

KinderStampO's Color it Monday Design Team Submission


Hello everyone! Jessica at KinderStampO is having her Color it Monday challenge today. Here is the color inspiration and my design team submission. I used the KinderStampO "Greetings from Home" stamp set for the sentiment.Check it out at the KinderStampO store. The butterflies are black Elizabeth Craft stickers that I stuck on top of cardstock covered in white glitter. I then colored over the glitter with my Copic markers. I really love the way the glitter sparkles underneath the Copic color. For the base of the card I welded a card using my Gypsy and the Ornamental Iron cartridge. The black gate cuts are also from the Ornamental Iron cartridge. Check out all the other submissions and join the fun at http://www.kinderstampo.com/

Materials:
KinderStampO "Grettings From Home" sentiment
Crystal Glitter Ritz
Elizabeth Craft Stickers
Punch Bunch flower punches
Ornamental Iron cartridge (for card and gate)
Gypsy Wanderings cartridge (for sentiment tag)

Thanks for looking! Have a wonderful day :)
Copic Markers
DCWV colored cardstock
Paper Trey Ink black cardstock

Wednesday, September 7, 2011

Meet the KinderStampO Design Team Blog Hop


Are you ready for some blog Candy?!

Jessica from KinderStampO is announcing her design team today and I'm very proud to announce that I have been chosen to be a part of this amazing group of ladies! I'm so eager to start sharing my work with all of you and I would be very honored if you would like to follow me. The KinderStampO motto is Live, Craft, Inspire so here is a little information about me and a new project so you can get a feel for my style.


Live

I live in sunny southern California where I'm a retail store manager for a national chain of clothing stores. I love clothes and fashion and I face new challenges and goals everyday. I live with my boyfriend of four years. I have always been into art and crafting and have managed to get in to many different crafts over the years and studied fine art in school.

Craft

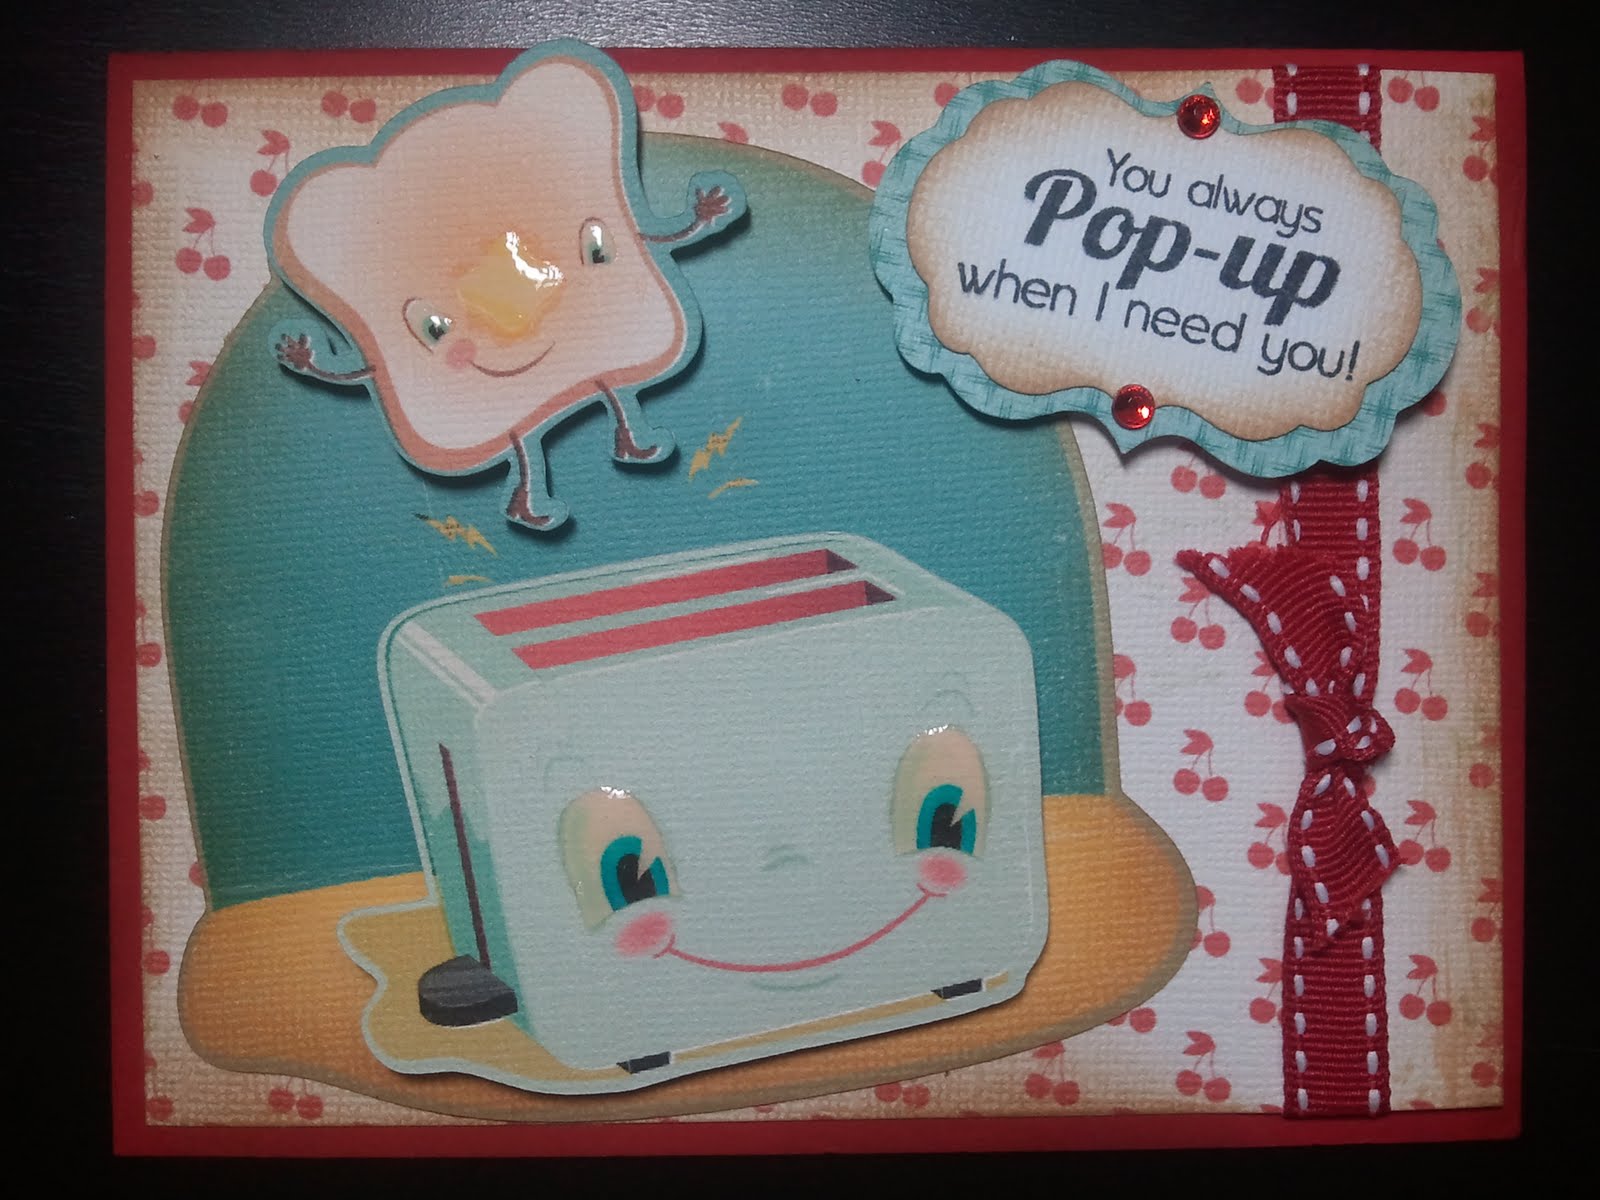
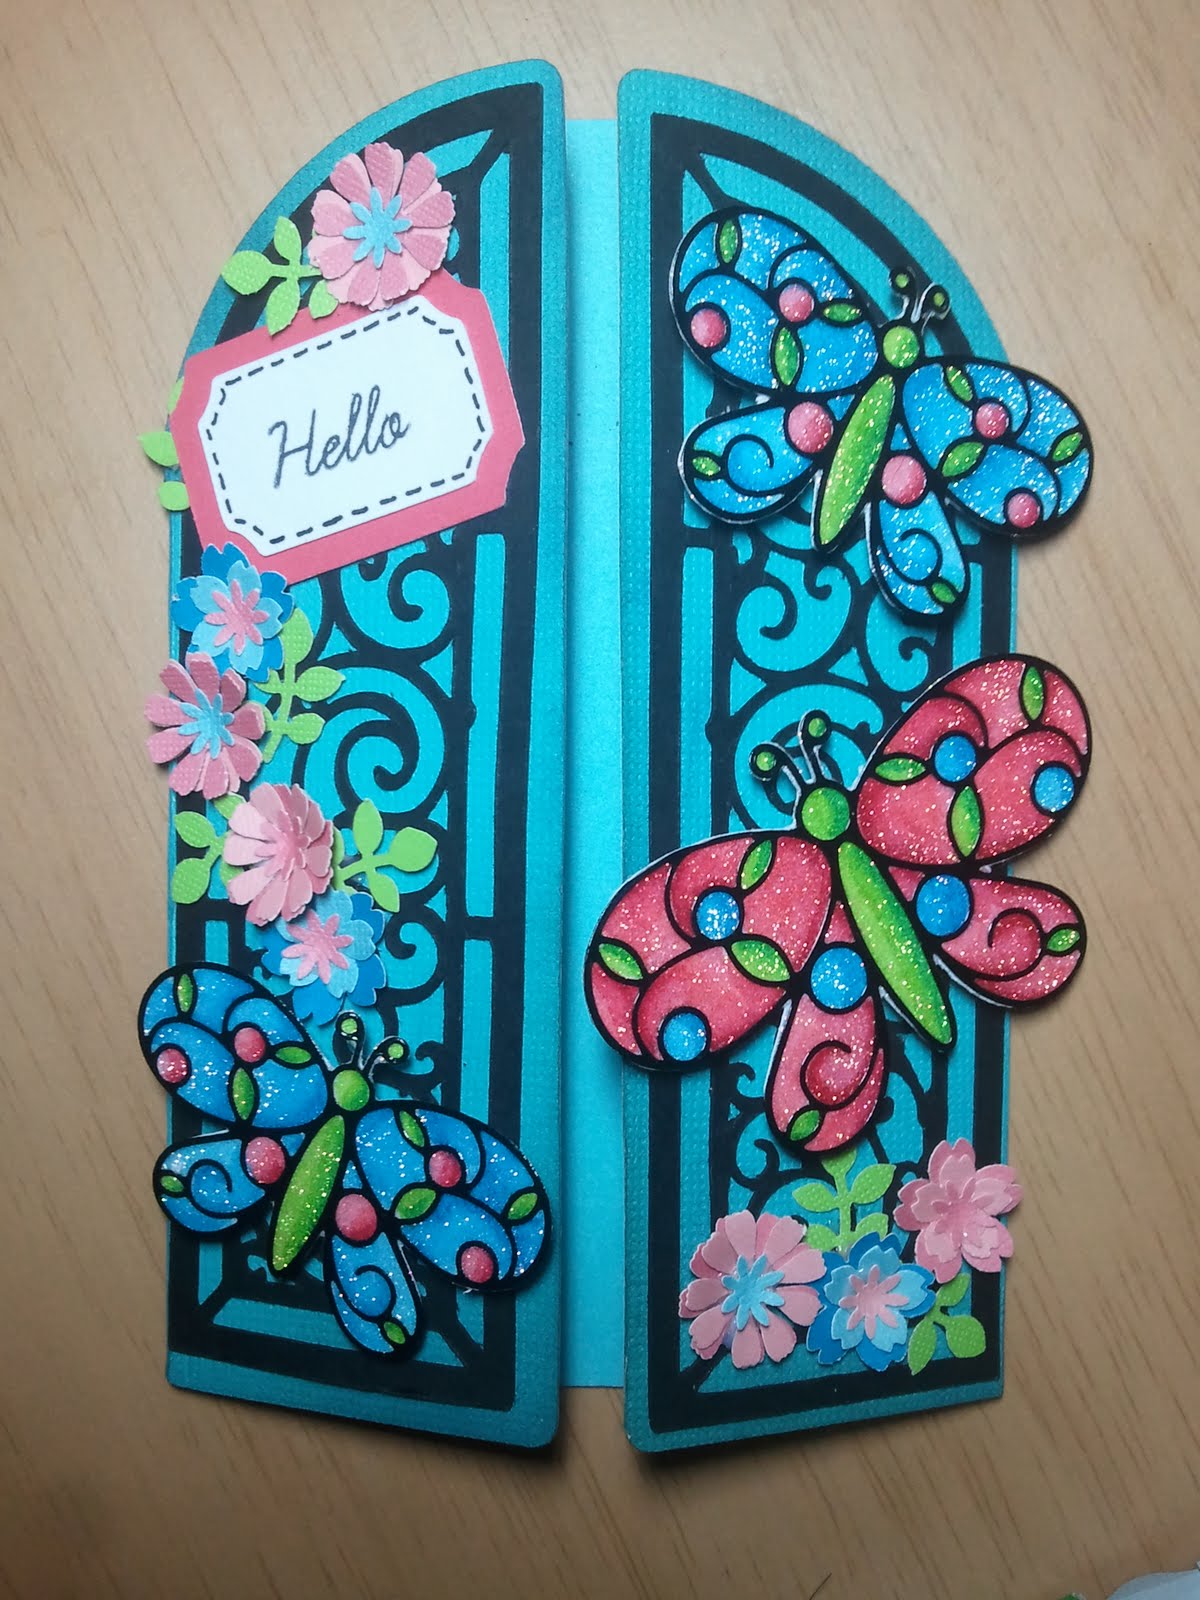
Currently my love is paper crafting and I love everything about it. I started my first scrapbook a little over a year ago and in that short time I have bought 2 Expressions, an Imagine, and acquired a huge number of Cricut cartridges because I'm totally addicted! My new love is using Copic markers to create cards. It's like coloring for adults and I find it very relaxing.


Inspire

I am totally inspired each and everyday by all the amazing crafters I see on the blogs and message boards. Every time they do something fabulous it inspires me to create something fabulous as well. I also really love the fact that we are able to get new ideas and techniques from each other and use them in our own way. I'm very excited to be on Jessica's deign team and I hope that the followers find a little bit of inspiration in my work as well whether it's a new technique or a new idea that they haven't come across yet. Hopefully I can challenge someone to try something new!


Now for the CANDY! You have a chance to win a KinderStampO prize box!

Stop by the KinderStampO Facebook page and tell them I sent you.
Become a follower of KinderStampO and leave a comment there and here too for a chance to win a prize.
**************************************************************
The next stop is the fabulous Sandy! Visit her blog Love and Be Loved
...lost your way? start from the beginning at KinderStampO.
Have fun hopping!

**************************************************************

Wednesday, August 31, 2011

Pink By Design Challenge Entry


Happy Wednesday everyone! This is my newest card that I am entering in the Pink By Design weekly challenge. I just love all of their stamps! The sets I used to make this card are "Make it a Venti", "Perk Up", and the coffee background stamp. I colored all of the images in with my copic markers. The tag for the sentiment is the first cut of the images that come with the Cricut Imagine machine. I hope you enjoy!

Monday, August 29, 2011

Create A Critter Meets Country Anya


I just can't seem to get enough of the Greeting Farm stamps lately. Here is my newest card with their Country Anya digi stamp. I also used my Cricut Create a Critter and Gypsy Wanderings cartridges for the paper piecing cuts. The sun, clouds and grass are all cut from white cardstock and colored with my copics. Anya is also colored with copics. It's getting kind of late and it's time for bed so I'm not going to list all of the other ingredients but please leave me a comment if you have any questions. I'm entering this is the Cricut Circle monthly challenge for August and The Greeting Farm's Farm Fresh Challenge. Thanks for looking!

Tuesday, August 23, 2011

Pink Anya Card


I decided to try the technique posted on The Greeting Farm Blog where you use a very light colored ink to stamp your stamp with so the lines are not visible after they are colored in. I'm not sure I like it as much as when you can see the stamp line but hey, I gave it a shot! I do however like the way the card turned out. I did add some lines in with a black jelly pen in the end anyways hehe. For the flowers I cut them with my cricut out of white cardstock and colored them in with my copics. I then rubbed a rounded tool on the backside of all the leaves to add dimension. Here is what I used to make the card:

DCWV yellow cardstock
Papertrey Ink rasberry fizz cardstock
Papertrey ink white stamping cardstock
Colorbok white cardstock for flowers and embossed section
copic markers
The Greeting Farm's "Fleur Anya" stamp
Pink By design's "shopaholic" stamp set for the sentiment
Cuttlebug Polka Dots embossing folder
Svgcuts.com 3d flowers set for the flower cuts
Tim Holtz Distress Ink in antique linen to stamp Anya
Memento ink in tuxedo black and rose bud for the sentiment
ribbon and rhinestones from my stash

I'm entering this card in The Greeting Farm's Mystery Monday challenge and ICopic's weekly challenge #44.

I hope you enjoy :)

Friday, August 19, 2011

Cupcake Anya


This is my newest card. I've been making it one piece at a time for a while now and I finally put it all together in to a card for The Greeting Farm's Fresh Friday Challenge and ICopic's All About Children blog hop. I love these stamps! They are so super cute. A lot of times I will just stamp a whole sheet of paper and color them in a little at a time at my leisure without really knowing what I am going to use them for. I just really enjoy the coloring part of stamping! I stamped out the oven and hand cut the background hole to fit the oven in and give it depth. The oven door opens and closes. I hope you enjoy!
Here is what I used:
copics
The Greeting Farm's Cupcake Anya digi stamp
Art Gone Wild's happy oven stamp set
cricut cuts for the background
Scrappy Mom's stamps "Sweet Nothings" for the sentiment
small buttons as accents

Thursday, August 18, 2011

Imagine Yummy Thank You Card


I just wanted to post this card I made a few days ago. I used my Imagine and the Yummy cartridge. I just love how easy it is to put cards together using the Imagine. I can make them in no time! I also used the Pink by Design stamp set called "Perk Up". You can check it out here. I hope you enjoy!

Thursday, August 11, 2011

Baby Boutique Thank You Card


It's been so long since I have had a chance to post but I'm glad to be back. A few months ago a got a Cricut Imagine and I've had so much fun so far with it! I just got the Baby Boutique cartridge and this is my first project with it. So here is the formula:

The bird is cut at 2" from Baby Boutique
The frame is cut at 3.5" from Baby Boutique
The pink background is printed from Baby Boutique and trimmed to fit card size
The thanks cut is at 1" and is from Cindy Loo
The flowers are hand punched from Punch Bunch and Carla Craft punches
Rhinestones are added for embellishment

I hope you enjoy!

Tuesday, March 15, 2011

Spring Bird Treat Bag and Card


Life has been kind of busy recently but I finally got a chance to make a new project to share with you. I made this for the Svg Cuts spring challenge. I used SvgCuts.com sets Robin's Return and Tied Suprise gift Boxes to construct these. I colored in the birds using my new copic markers. The stamps are from My Pink Stamper's Tweetie Hoo Puns set. I hope you enjoy :)

Wednesday, February 23, 2011

Spring card to brighten your day!


I've been so busy recently but I finally had time to make another card to share with you. I made this card to enter in My Creative Time's Throwback Thursday challenge and also Peachy Keen's sketch challenge. The throwback Thursday challenge was to create a project with flowers using the "Walk in My Garden" cartridge. I didn't have that cartridge so I used "Create a Critter" instead. I also used Gypsy Wanderings for the blue background tag and the green and white tags. The sentiment is from Emma at My Creative Time's stamp set called "Turn That Frown Upside Down". I hope you enjoy!