Tuesday, January 3, 2012

Giveaway Winner and a Christmas card!


I'm so sorry for being away so long! Things got so crazy between work and Christmas the last few weeks and I just didn't have time to blog. I really apologize for being so late with the giveaway winner but I'll include a few extra goodies in my shipment to hopefully make up a little for my tardiness. Without further hesitation I'm very pleased to announce the winning comment:


Janette said...

Great gift bags. Thanks for sharing your creativity and for the give away. Very generous of you. I am now also a new follower. Looking forward to see. More.


Janette please email me at MelissaBellDesigns@gmail.com with your info so I can send out you package asap! Thanks again to all of you who participated.

I wanted to share with you a few gifts that I made for Christmas as well. I used The Jolly Holidays Cricut Cartridge for the card image and I also used My Creative Time's All Around Christmas stamp set and coordinating Scalloped and Stitched Circle Die set for the sentiment. The candy treat bags are made with My Creative Time's Stitched Lollipop Holder Die, the All Around Christmas stamp set, and the Scalloped and Stitched Circle Die. Thanks for stopping by and have a happy new year!


Monday, November 28, 2011


Scroll down for giveaway details!

Good morning everyone! It's time for another of KinderStampO's Color it Monday. Here is a picture of the inspiration and my project. I used the Imagine to color and cut the different pieces. The hot chocolate cut is from the Yummy cartridge. The sentiment says "Everything's better with hot chocolate" and is from KinderStampO's Vintage and Traditional Holiday stamp set. You can check it out here.

*************************************************

Hello everyone! To celebrate the holidays I will be doing a giveaway! Everyone who is a follower and leaves a comment on my blog between November 22 and December 18 will be entered to win the Gingerbread Cricut cartridge, Inkadinkado Christmas stamps, and Stickles bundle! The winning comment will be posted on December 19!
***************************************************

Thanks for stopping by!

Wednesday, November 23, 2011

KinderStampO's Sketchy Wednesday

Scroll down for giveaway information!


Hello everyone! It's time for another of KinderStampO's Sketchy Wednesdays. Here is a picture of the sketch and my project. I used the Santa's Village Imagine cartridge again for this project. It came together very quickly and was super simple! I cut this out using Cricut Craftroom. I used a basic square shape and filled it in with one of the patterns on Santa's Village and then cut Mrs. Clause with layers so I could pop up her face and arms. The sentiment is from KinderStampO's "Vintage and Traditional Holiday" stamp set that you can check out here.

*************************************************

Hello everyone! To celebrate the holidays I will be doing a giveaway! Everyone who is a follower and leaves a comment on my blog between November 22 and December 18 will be entered to win the Gingerbread Cricut cartridge, Inkadinkado Christmas stamps, and Stickles bundle! The winning comment will be posted on December 19!
***************************************************

Thanks for stopping by!

Wednesday, November 16, 2011

KinderStampO's Sketchy Wednesday


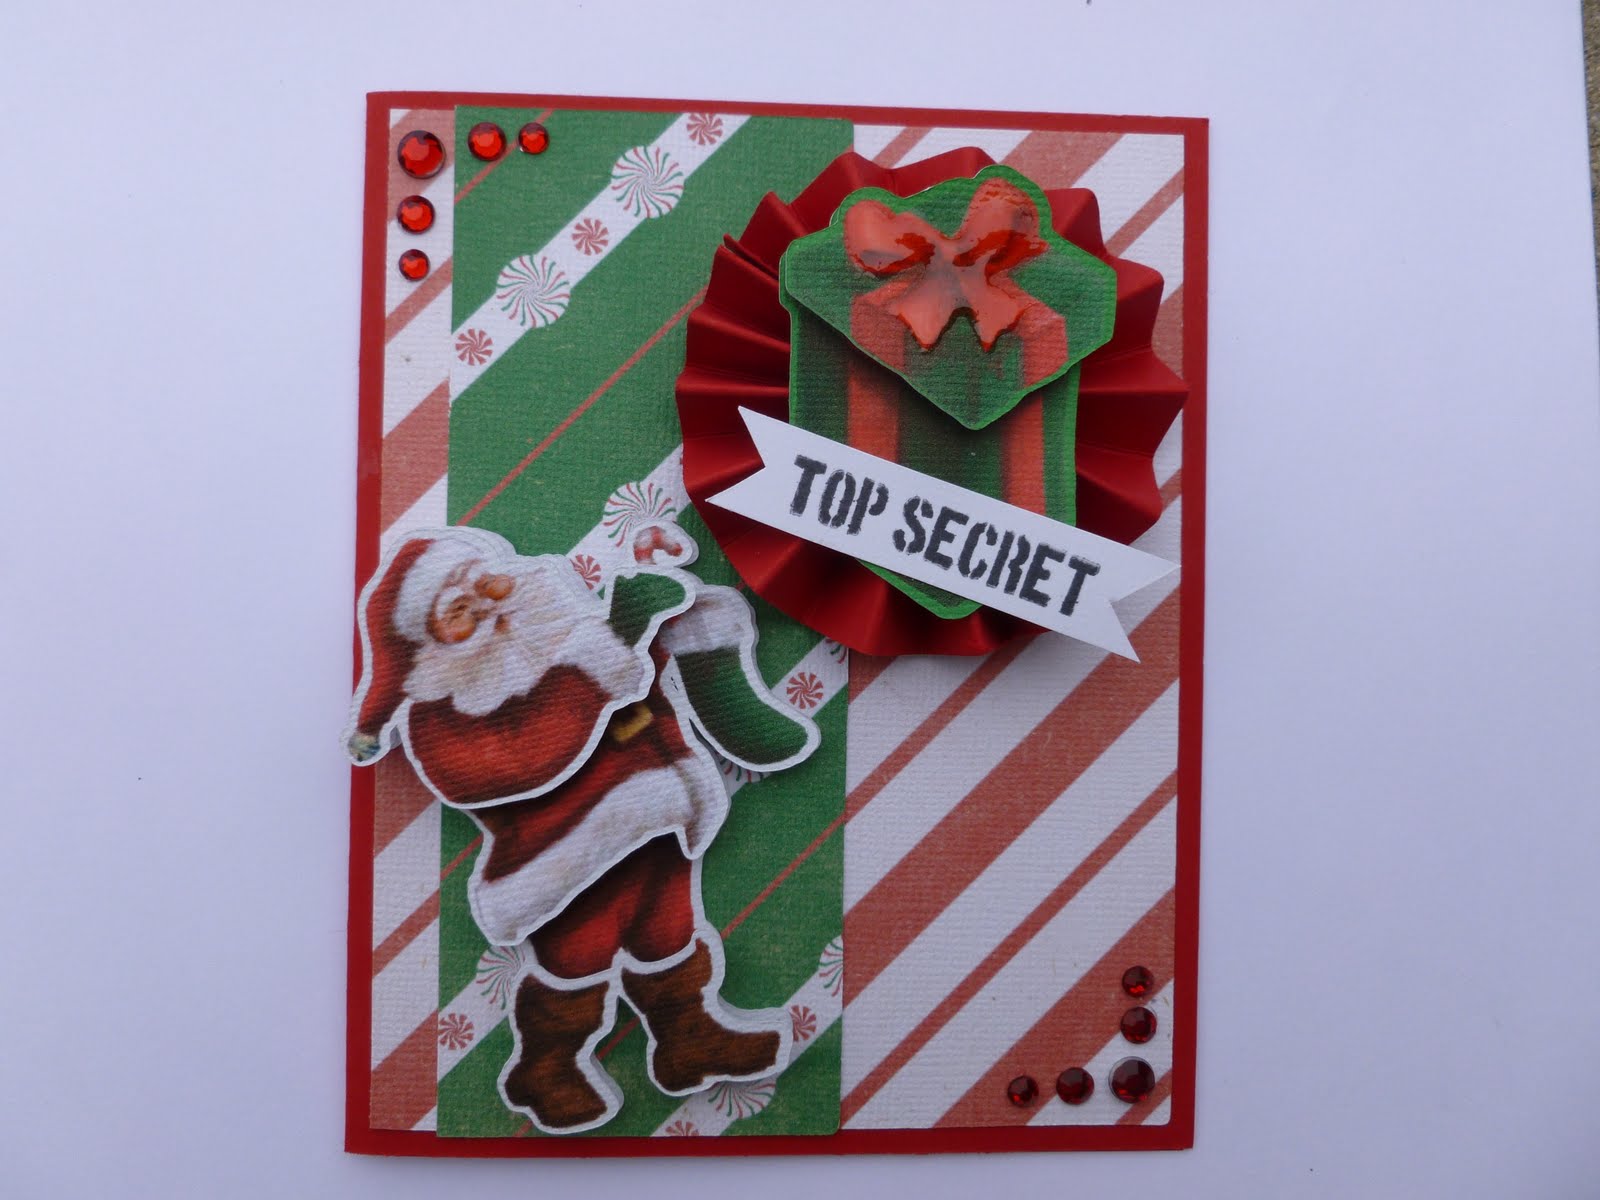
Good morning everyone! It's time for KinderStampO's sketchy Wednesday. I have included a picture of the sketch and my card. This is my first project with the new Santa's Village Imagine cartridge. I LOVE this cartridge! Santa is three layers tall with his torso popped up and his arm popped up on top of that. I love the dimension that this creates but it doesn't translate well in this picture. His boots are also popped up. This cartridge really allows you to do a lot of layering if that's the look you desire. The present is on top of a handmade rosette and I added some Glossy Accents to the bow top. The sentiment is from KinderStampo's "Greetings From Home" stamp set. I'm really happy with how this turned out and it was so super simple to put together thanks to the Imagine. Thanks for stopping by! Have a fantastic day.

Monday, November 14, 2011

KinderStampO's Color it Monday


Hello everyone! I just got back from the local Scrapbooking Expo and I was so excited to use my new toys from the show! For this card I used a stamp and die set from Heartfelt Creations to make the flowers. The stamps and the dies coordinate perfectly together. I stamped the flowers with black ink and then cut them with the matching dies. After that I colored them in with Copic markers and added Coral Reef and Vanilla Breeze Glimmer Mist sprays to them as well. I darkened the edges with Distress ink and glued a little Martha Stewart glitter to the inside of the flowers. The stamp set I used for the sentiment is from KinderStampO's "Greetings From Home" stamp set. I hope you enjoy!

Monday, November 7, 2011

KinderStampO's Color it Monday


Hello everyone! Here is another submission for KinderStampO's color it Monday. I love how the colors work together in this card. It's very bright and fun. I used KinderStampO's "Greetings From Home" stamp set for the sentiment. I used an Anya stamp from The Greeting Farm and Copic markers to color the stamp in. The flowers are Prima and their brad centers are from Close to My Heart. The orange cardstock is cut with a Martha Stewart border punch and I topped it all off with a ribbon from my stash. Thanks so much for stopping by!

Monday, October 24, 2011

KinderStampO's Color it Monday


Hello everyone! It's time again for another KinderStampO Color it Monday. On this card I used Grungepaper covered in silver paint dauber and crackle paint. After I let that dry I cut out the cage using the Tim Holtz Sizzix Caged Bird die. I then cut the bird section of the die also from Grungepaper, inked it up, and then covered it in Glossy Accents. I took one of KinderStampO's Vintage Letter charms and covered it with a silver paint dauber and stamped my sentiment inside of it. I used the KinderStampO "Greetings From Home" stamp set. Once the sentiment was dry I also covered that with Glossy Accents. For the pink and silver background paper I used a white sheet of cardstock and stamped it with a background stamp that was inked up with silver paint dauber. I then brushed on pink die ink. I hope you enjoy! Thanks for stopping by :)